Hunter 53134 52 Aventine User Manual
Browse online or download User Manual for Fans Hunter 53134 52 Aventine. Hunter 53134 52 Aventine User Manual
- Page / 17
- Table of contents
- TROUBLESHOOTING
- BOOKMARKS
- Table of Contents 1
- Shorter Downrod 2
- Longer Downrod 2
- Standard Downrod 2
- Tools Needed 3
- Mounting Options 4
- Ceiling Bracket (continued) 6
- Preparation 6
- 1 2 3 4 5 7
- Downrod (continued) 8
- 1.888.830.1326 11
- Switch Housing 13
- Light Kit 14
- CONGRATULATIONS! 15
- YOU’RE DONE! 15
- Turn Power 16
- Troubleshooting 17
Summary of Contents
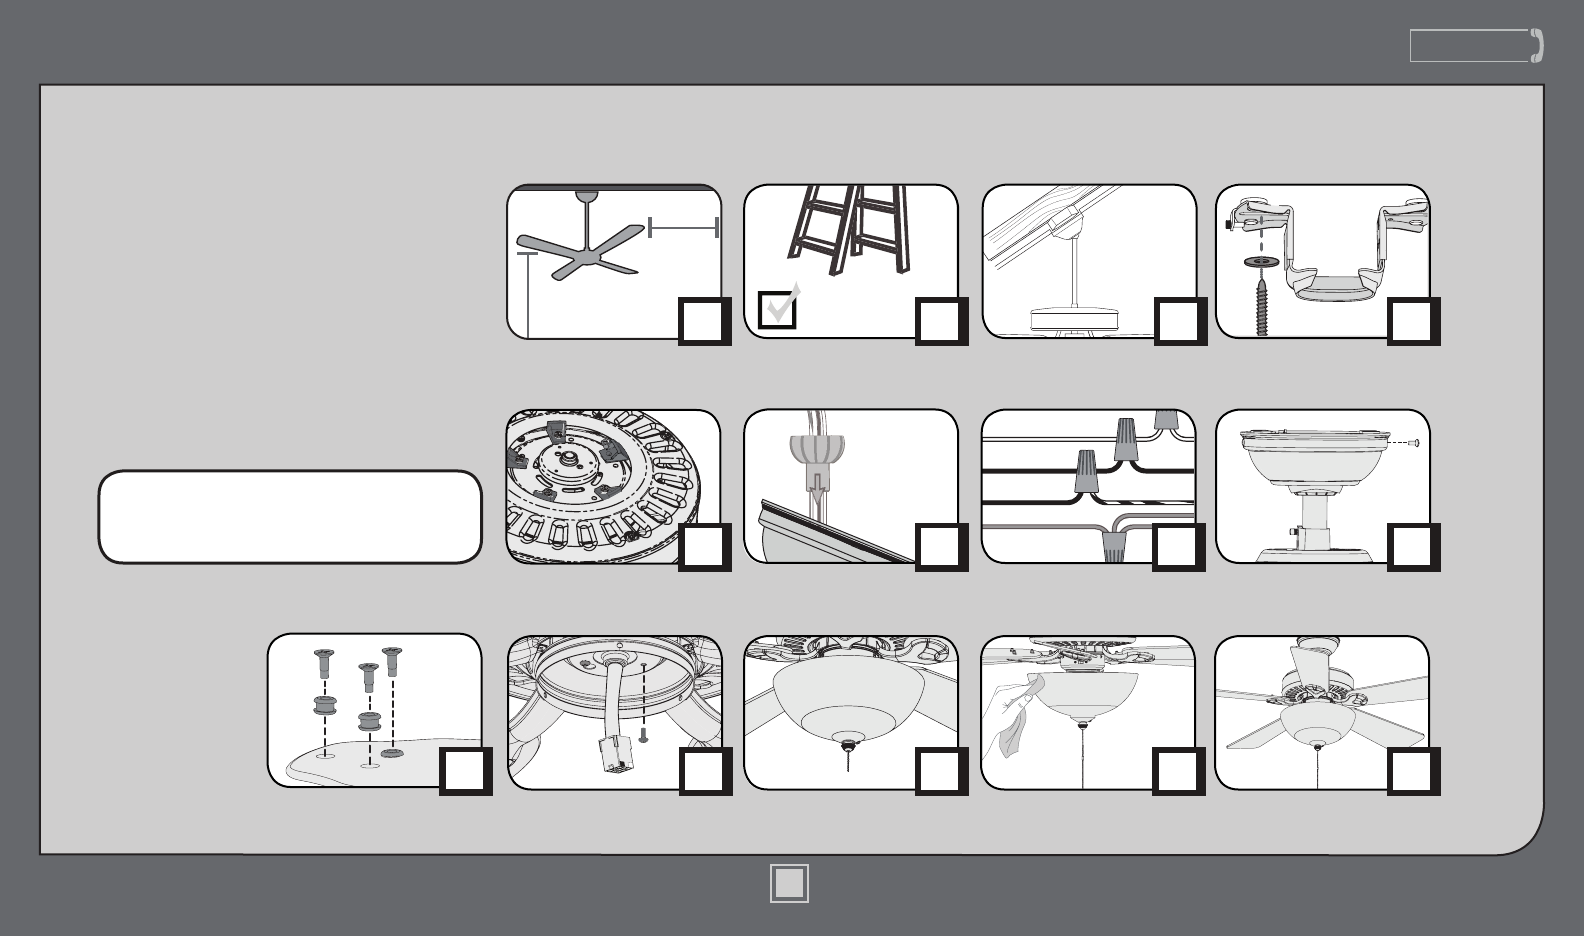
www.HunterFan.com1.888.830.1326PAGE7PAGE13PAGE10PAGE5PAGE630 inches7 feetPAGE2What to Expect with Your InstallationCeiling BracketLadderPAGE3Tools Nee
www.HunterFan.com1.888.830.1326WiringFROM FANFROM CEILING BRACKETFROM FANUsing an orange wire connector from the hardware bag, connect the 3 gr
www.HunterFan.com1.888.830.1326CanopyLift the canopy into place so that the screw holes are aligned. Position the canopy so that, when lifted into pla
www.HunterFan.com1.888.830.1326BladesYour blades are shielded with Dust Armor® which is a nanotechnology coating that repels dust. For cleaning the fa
www.HunterFan.com1.888.830.1326Feed the wire plug through the center hole of the upper switch housing, then wrap keyhole slots around the screws and t
www.HunterFan.com1.888.830.132614M0043-01 • 01/29/14 • © Hunter Fan CompanyLight KitMake sure the lower switch housing is securely attached to the upp
www.HunterFan.com1.888.830.1326Light Kit (continued)CONGRATULATIONS!YOU’RE DONE!See next page for fan operation instructions.Connect the appropriate p
www.HunterFan.com1.888.830.1326Maintenance & CleaningONTurn PowerChanging the bulbs - unscrew the nial and remove it from the threaded rod. Remov
www.HunterFan.com1.888.830.1326Troubleshooting Excessive wobbling• Tighten all of the blade and blade iron screws until they are snug.• Turn the
www.HunterFan.com1.888.830.1326M0043-01 • 01/29/14 • © Hunter Fan Company1.888.830.13261.888.830.1326What to Expect with Your InstallationKnow your wi
www.HunterFan.com1.888.830.1326Tools NeededLadderPower Drill (optional)9/64” Drill Bit (optional)ScrewdriversPliers Wire StrippersIf mounting to a sup
www.HunterFan.com1.888.830.13264M0043-01 • 01/29/14 • © Hunter Fan CompanyIf you have an angled ceiling:1. You will need a longer downrod (sold separa
www.HunterFan.com1.888.830.1326Ceiling BracketOFFMake sure all four (4) bumpers are still attached.For angled ceilings, point opening toward peak.Refe
www.HunterFan.com1.888.830.1326Ceiling Bracket (continued)Preparation1.888.830.1326www.HunterFan.comDISCARDKEEP!Remove the shipping blocks from the mo
www.HunterFan.com1.888.830.13267M0043-01 • 01/29/14 • © Hunter Fan CompanyDownrodSlideSlide1 2 3 4 5678910Sold SeparatelyIncludedLonger Downrodfor ang
www.HunterFan.com1.888.830.13268M0043-01 • 01/29/14 • © Hunter Fan CompanyKEEP!8”3/8”CUT& STRIP(not to scale)Remove the pre-installed setscrew so
www.HunterFan.com1.888.830.1326Downrod (continued)DO NOT PICK THE FAN UP BY THE CANOPY OR WIRES. Place the downrod ball into the slot in the ceiling b
More documents for Fans Hunter 53134 52 Aventine

Related products and manuals for Fans Hunter 53134 52 Aventine
 (15 pages)
 (15 pages)
(17 pages)
(18 pages)
(18 pages)
(18 pages)
(18 pages)
(17 pages)
(17 pages)
(17 pages)
(18 pages)
(18 pages)
(19 pages)
(19 pages)
(17 pages)
(17 pages)
(15 pages)
(17 pages)
(18 pages)
(18 pages)
(18 pages)
(18 pages)
(17 pages)
(17 pages)
(17 pages)
(18 pages)
(18 pages)
(19 pages)
(19 pages)
(17 pages)
(17 pages)
© 2020, manymanuals.com. All rights reserved. | 0.084 s |
 Manymanuals.com
 Manymanuals.de
 Manymanuals.fr
 Manymanuals.it
 Manymanuals.pl
 Manymanuals.cz
 Manymanuals.es
 Manymanuals-pt.com
Comments to this Manuals